

Factory Fitted INEOS Winch
Servicing Manual
The factory-fitted INEOS winch is engineered to meet the toughest off-road demands, offering unparalleled reliability and performance straight from the production line. Designed in collaboration with us here at RED Winches, this integrated system ensures that every INEOS vehicle which has been fitted with a winch meets the highest standards of strength, durability, and control. Whether used in remote expeditions, recovery scenarios, or utility work, the factory-fitted winch provides seamless operation and dependable results when it matters most.
To maintain optimal performance and safety, it is essential that all servicing and testing procedures are carried out in accordance with RED Winches' guidelines. This article serves as a comprehensive guide to inspecting, testing, and maintaining your factory-fitted INEOS winch, ensuring it remains in peak condition throughout its service life. From functional checks and lubrication to rope replacement and fault diagnostics, every step is outlined to support technicians and operators in keeping the winch ready for action.
Introduction
This guide outlines the required actions at each phase of the winch servicing and testing process. It ensures all process outputs meet predetermined performance and quality requirements, maintaining the high standards expected of RED Winches products.
The Purpose is to provide a comprehensive procedure for the inspection, testing, and servicing of RED Winches, ensuring consistency and reliability in winch performance.
Health & Safety
-
Manual Handling: Winch units weigh approximately 28kg. Always assess the load before lifting and request assistance if necessary.
-
PPE: Gloves must be worn when feeding the rope into the winch to prevent injury.
Responsibility
-
Individuals assigned to test or service the winch are responsible for following the steps outlined in this guide.
Inspection & Evaluation
1 Function Checks
-
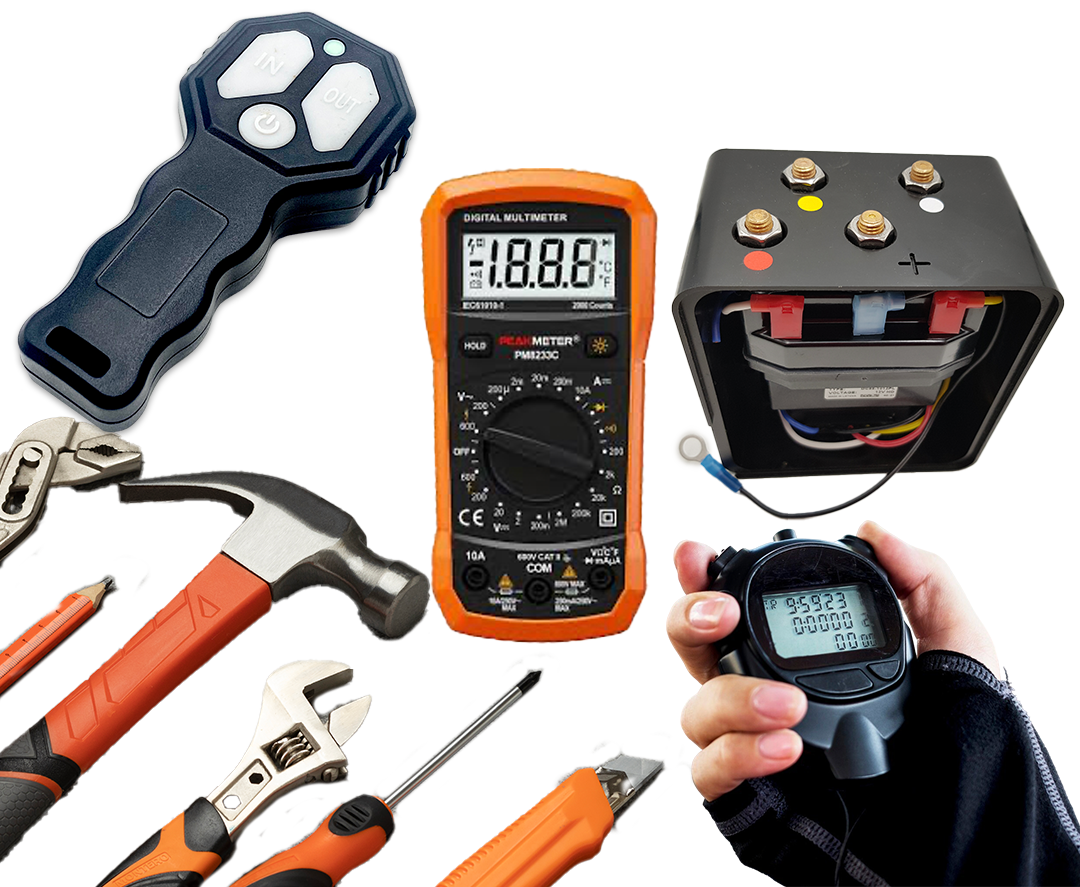
Operate winch in/winch out using the wireless hand controller.
-
Engage the free spool and pull the rope from the drum manually to check engagement.
2 Electrical Performance
-
Measure amp draw using a clamp meter (see rope speed test section). Under no load, it should be under 100 amps in either direction.
3 Physical Inspection
-
Check the synthetic rope for wear or damage.
-
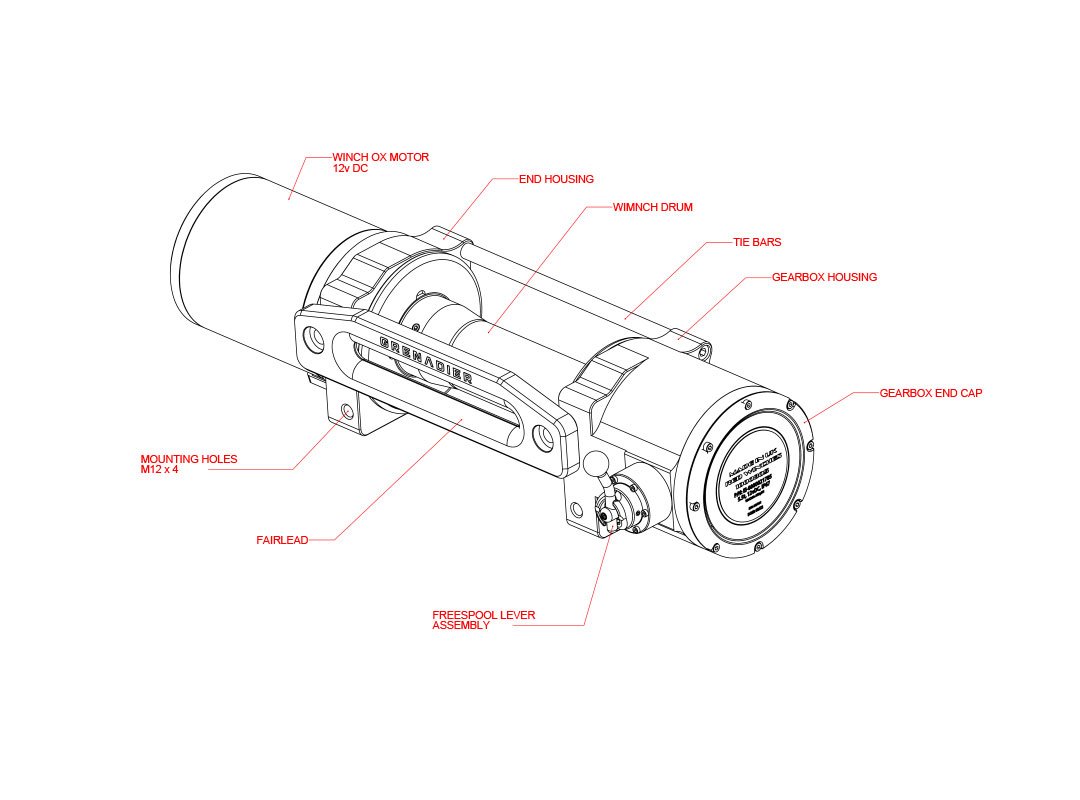
Remove vehicle undertray and inspect:
-
Rear tie bars for bends caused by rope bunching.
-
Electrical terminals for cleanliness and tightness. Apply suitable grease if required.
-
4 Fairlead (Rope Guide) Inspection
-
Check for damage or sharp edges which may harm the rope.
-
Grooved or worn fairleads should be replaced.
Winch Servicing
Lubrication Requirements
-
Gearbox: 100g EP2 Lithium Grease
-
Freespool O-Rings: Silicone Grease
-
Drum Lip Seals: 5W-30 Synthetic Oil
Disassembly Steps
- Loosen motor screws.
- Remove motor.
- Undo tie bars.
- Lift off motor end plate and drum.
- Remove brake grub screws and drift brake from drum.
- Remove free spool assembly.
- Remove gearbox cover fixings.
- Extract gearbox components.
Part Number List For Spares
Turn on mobile.
| INEOS Part Number | Service Part Number | RED Winches Part Number | Description | Exclusive to INEOS |
| EE-0000001635 | GRA-9T00-027970 | CB150A-M | CIRCUIT BREAKER (M8 STUDS) | YES |
| EI-0000017176 | GRA-7A01-006480 | RWG-MD-15 | FAIRLEAD | YES |
| EI-0000020321 | GRA-7A11-003070 | WH-01 | WIRELESS HAND CONTROLLER | NO |
| EI-0000020499 | GRA-7A11-019690 | RWG-MD-17 | EARTH SPACER | NO |
| EI-0000020508 | GRA-7A11-011160 | M8 CAP | PLASTIC M8 NUT COVER | NO |
| EI-0000021833 | GRA-9T00-030280 | RWG-E01-ECE | EARTH CABLE (ECE) | YES |
| EI-0000021834 | GRA-9T00-018820 | RWG-E01-ROW | EARTH CABLE (ROW) | YES |
| EI-0000021786 | GRA-7A11-029880 | RWG-GA-01 | FRONT INTEGRATED WINCH (WITHOUT ROPE) | YES |
| EI-0000022110 | GRA-7A11-029890 | RWR-11MMX15M | FRONT WINCH ROPE | NO |
| EI-0000027045 | GRA-9T00-012970 | RWG-EA-02F | AS - WINCH POWER SUPPLY | YES |
| EI-0000015886 | GRA-9T00-019480 | RWG-MA-06 | CONTROL BOX | YES |
| EI-0000017408 | GRA-9T00-019500 | RWG-EA-01F | WIRING HARNESS (ECE) | YES |
| EI-0000021824 | GRA-9T00-012980 | RWG-E02 | POWER CABLE | YES |
| EI-0000012308 | GRA-0B11-001280 | CRD-RWG-A01 | REAR WINCH MOUNTING KIT | YES |
| EI-0000015301 | GRA-0B11-001330 | RWG-GA-01R | REAR WINCH (WITHOUT ROPE) | YES |
| EI-0000021325 | GRA-0B11-031840 | RWR-9MMX20M | REAR WINCH ROPE | NO |
| AWAITING INEOS PART NUMBER | OXMOTOR12V-MA-03 | OX MOTOR MA 03 12V | NO | |
| AWAITING INEOS PART NUMBER | DC88-1012PL | HEAVY DUTY SOLENOID 12V (ALBRIGHT) | NO | |
| AWAITING INEOS PART NUMBER | RWG-FB-02 | FRICTIO BRAKE WITH BEARING | NO |
Rope Speed Test
1 Testing Conditions
Measure no-load amp draw and line speed to assess winch performance.
2 Amp Draw Locations
-
At the circuit breaker: Use a clamp meter on the rear cable.
-
At the control box: Clamp the red cable from the winch isolator.
3 Normal Readings
-
Amp draw under no load should be < 100 amps.
-
Variation between winch in/out is normal due to motor efficiency.
4 Line Speed Test
-
Spooling rope from the red marker to stop label should take 80 ± 10 seconds.
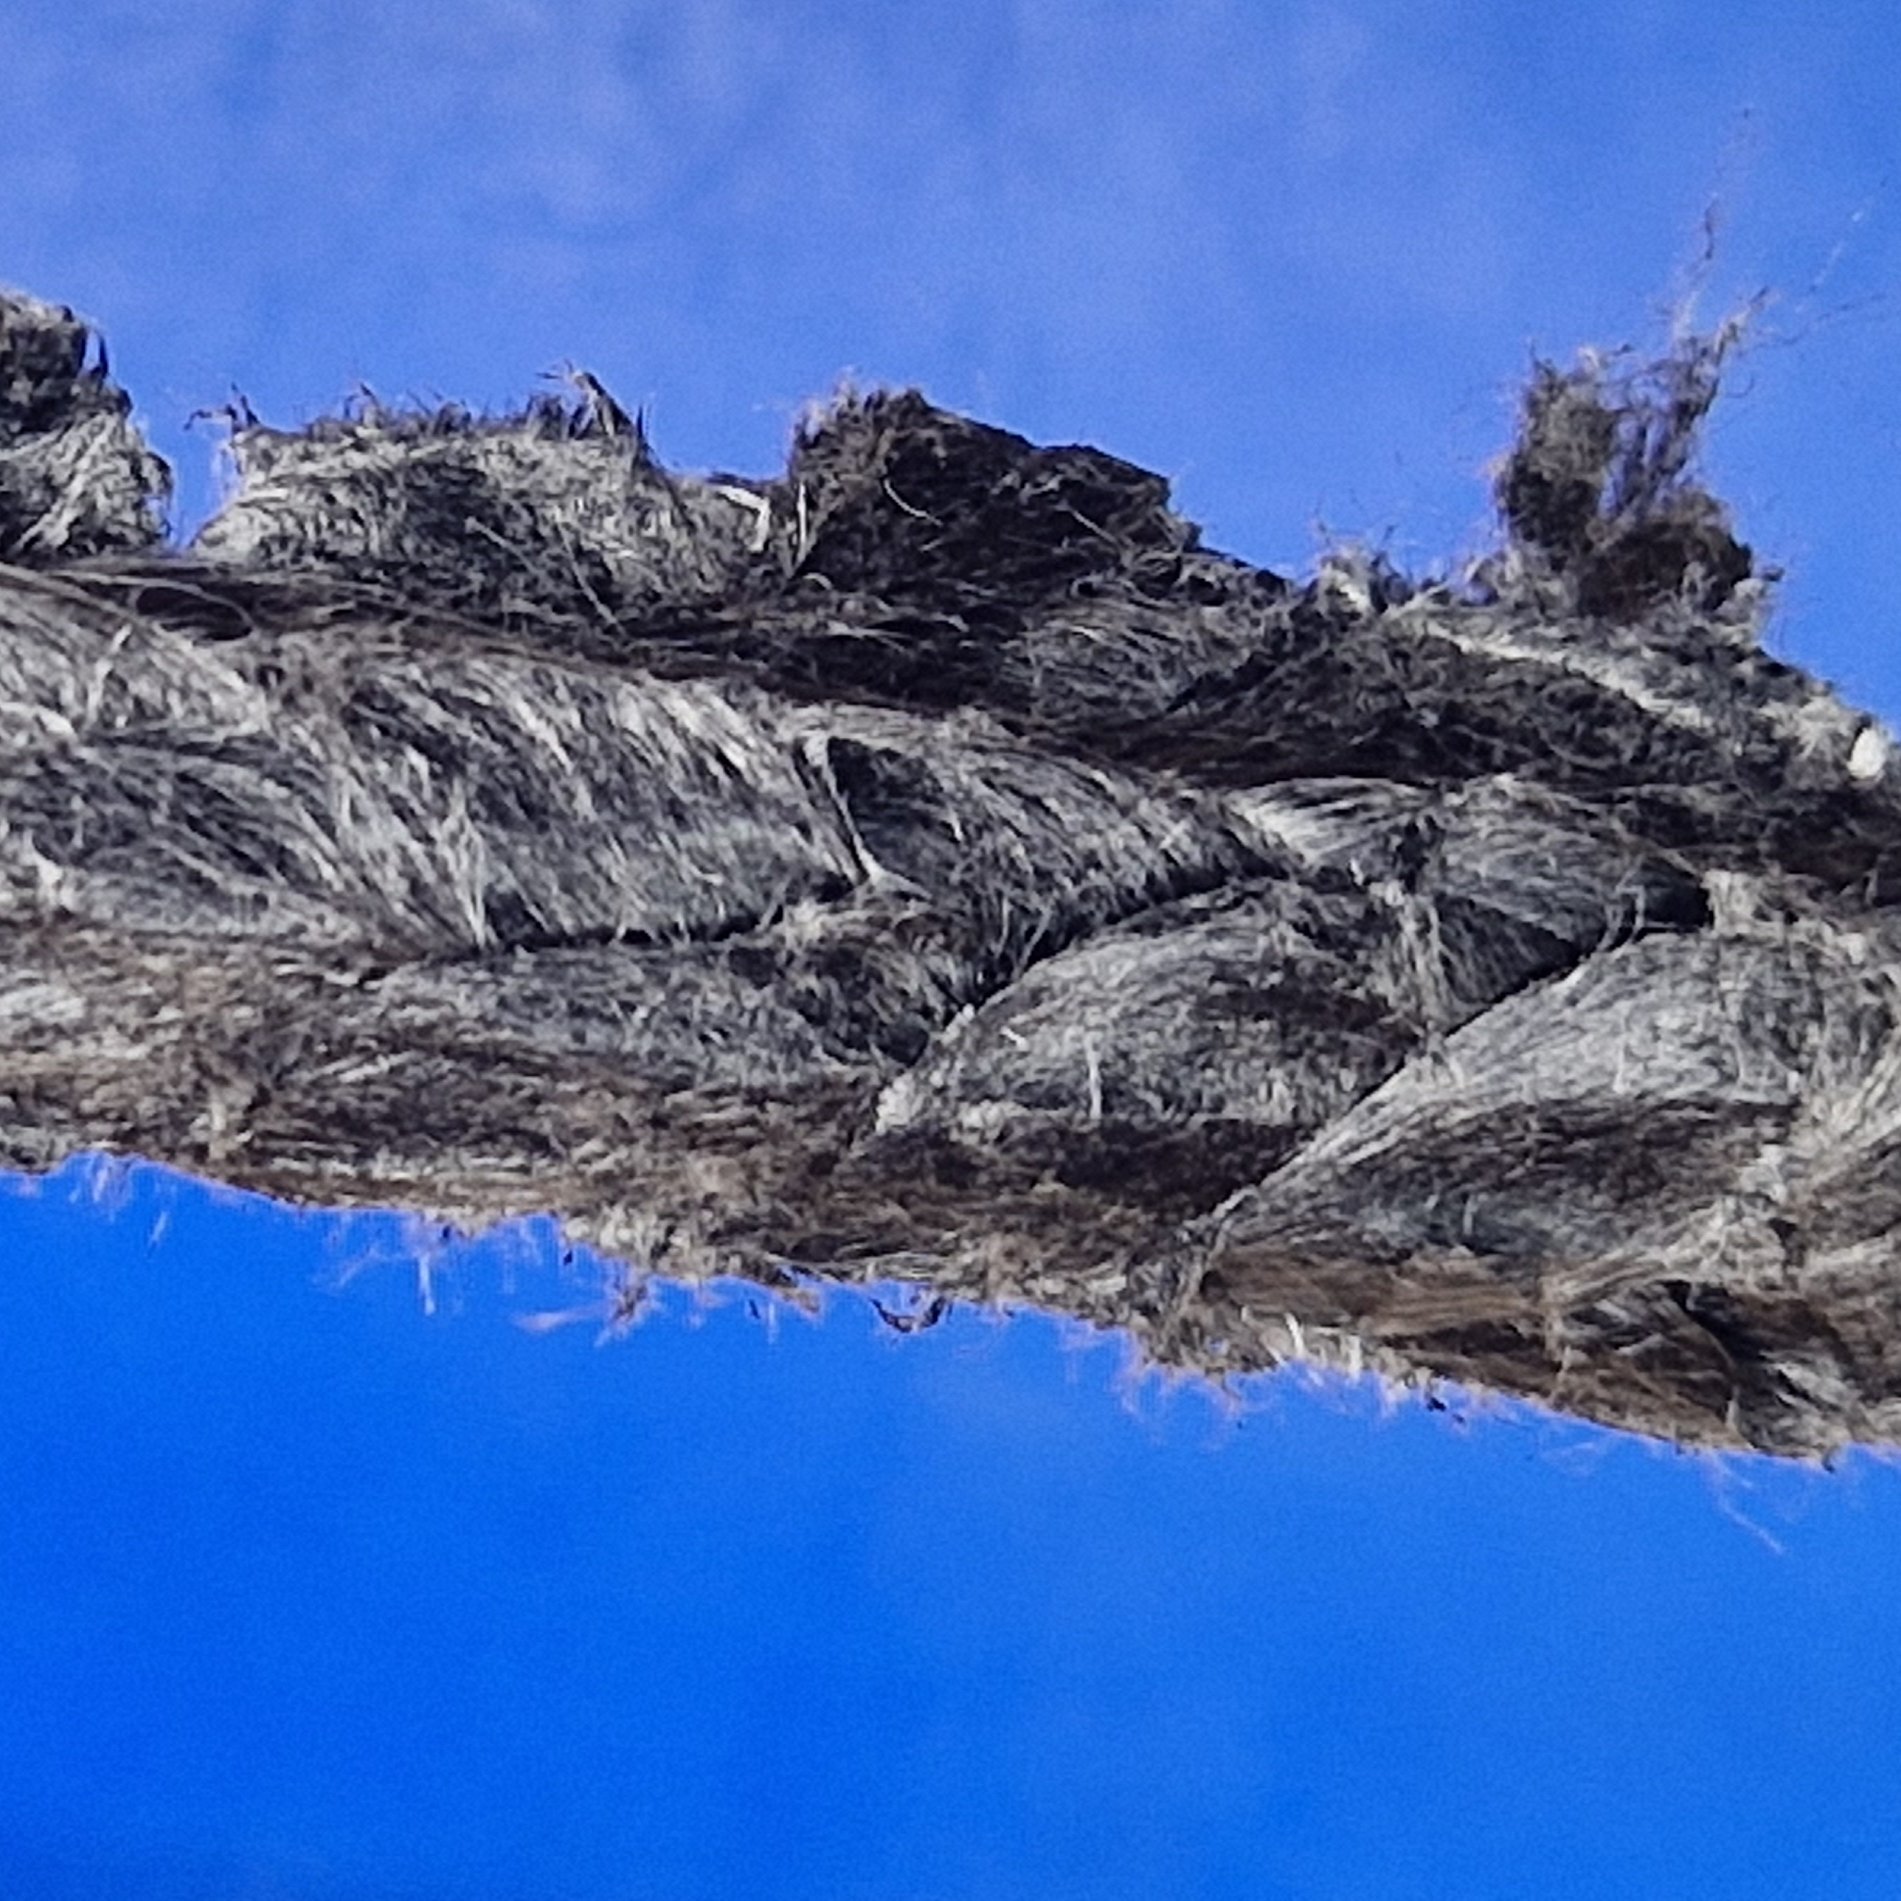
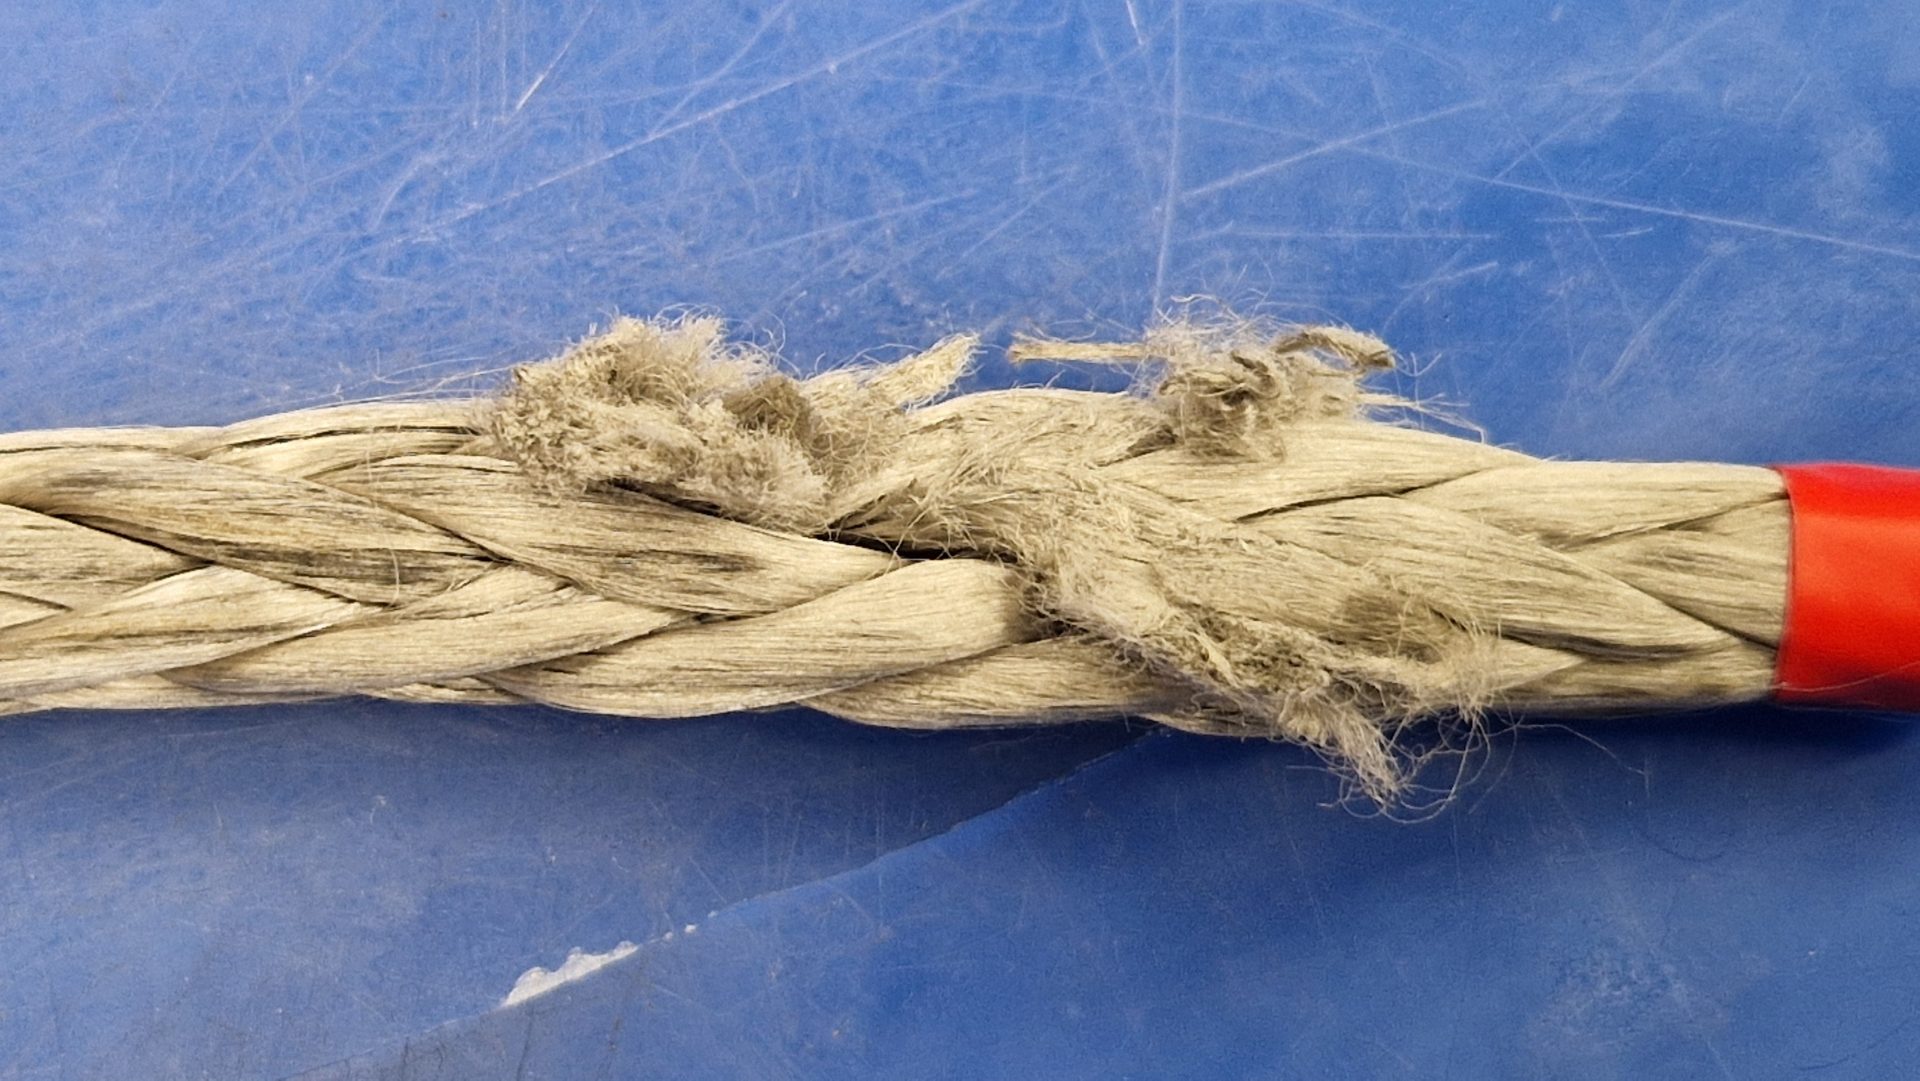
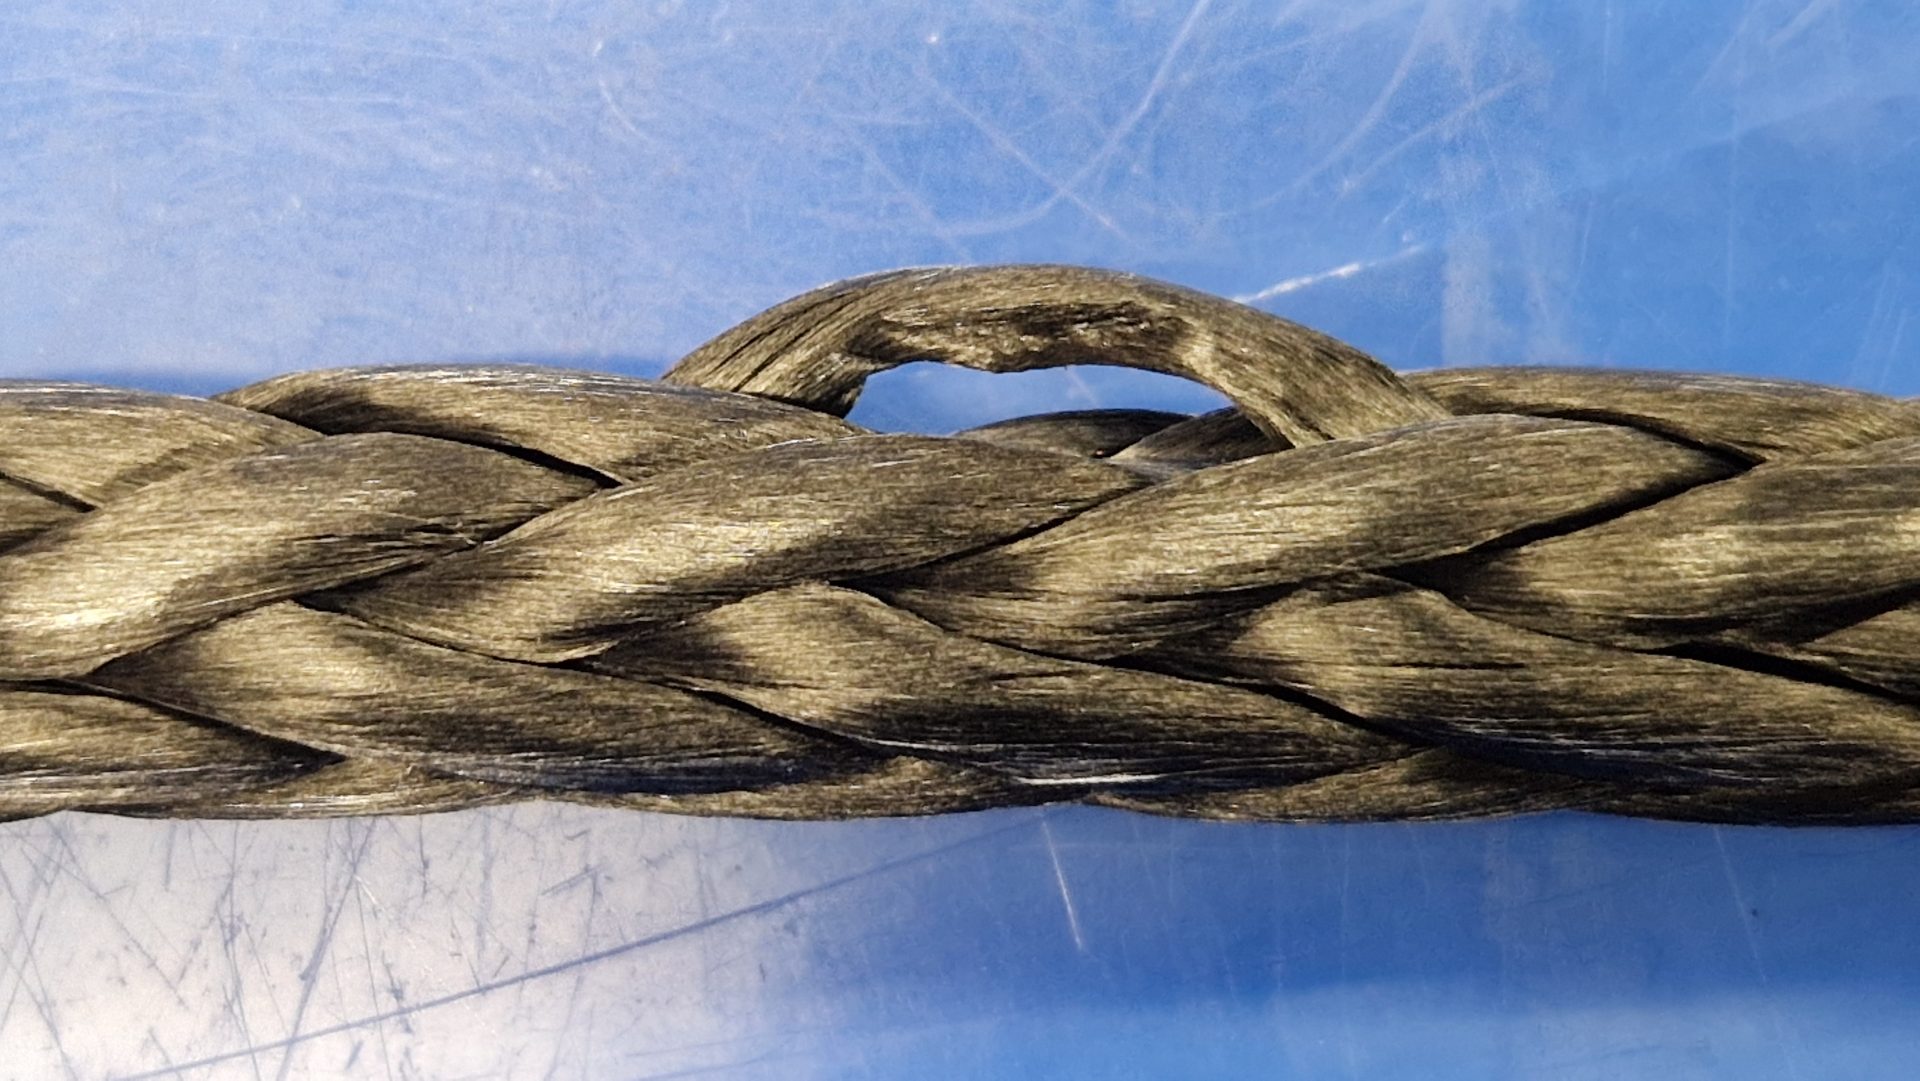
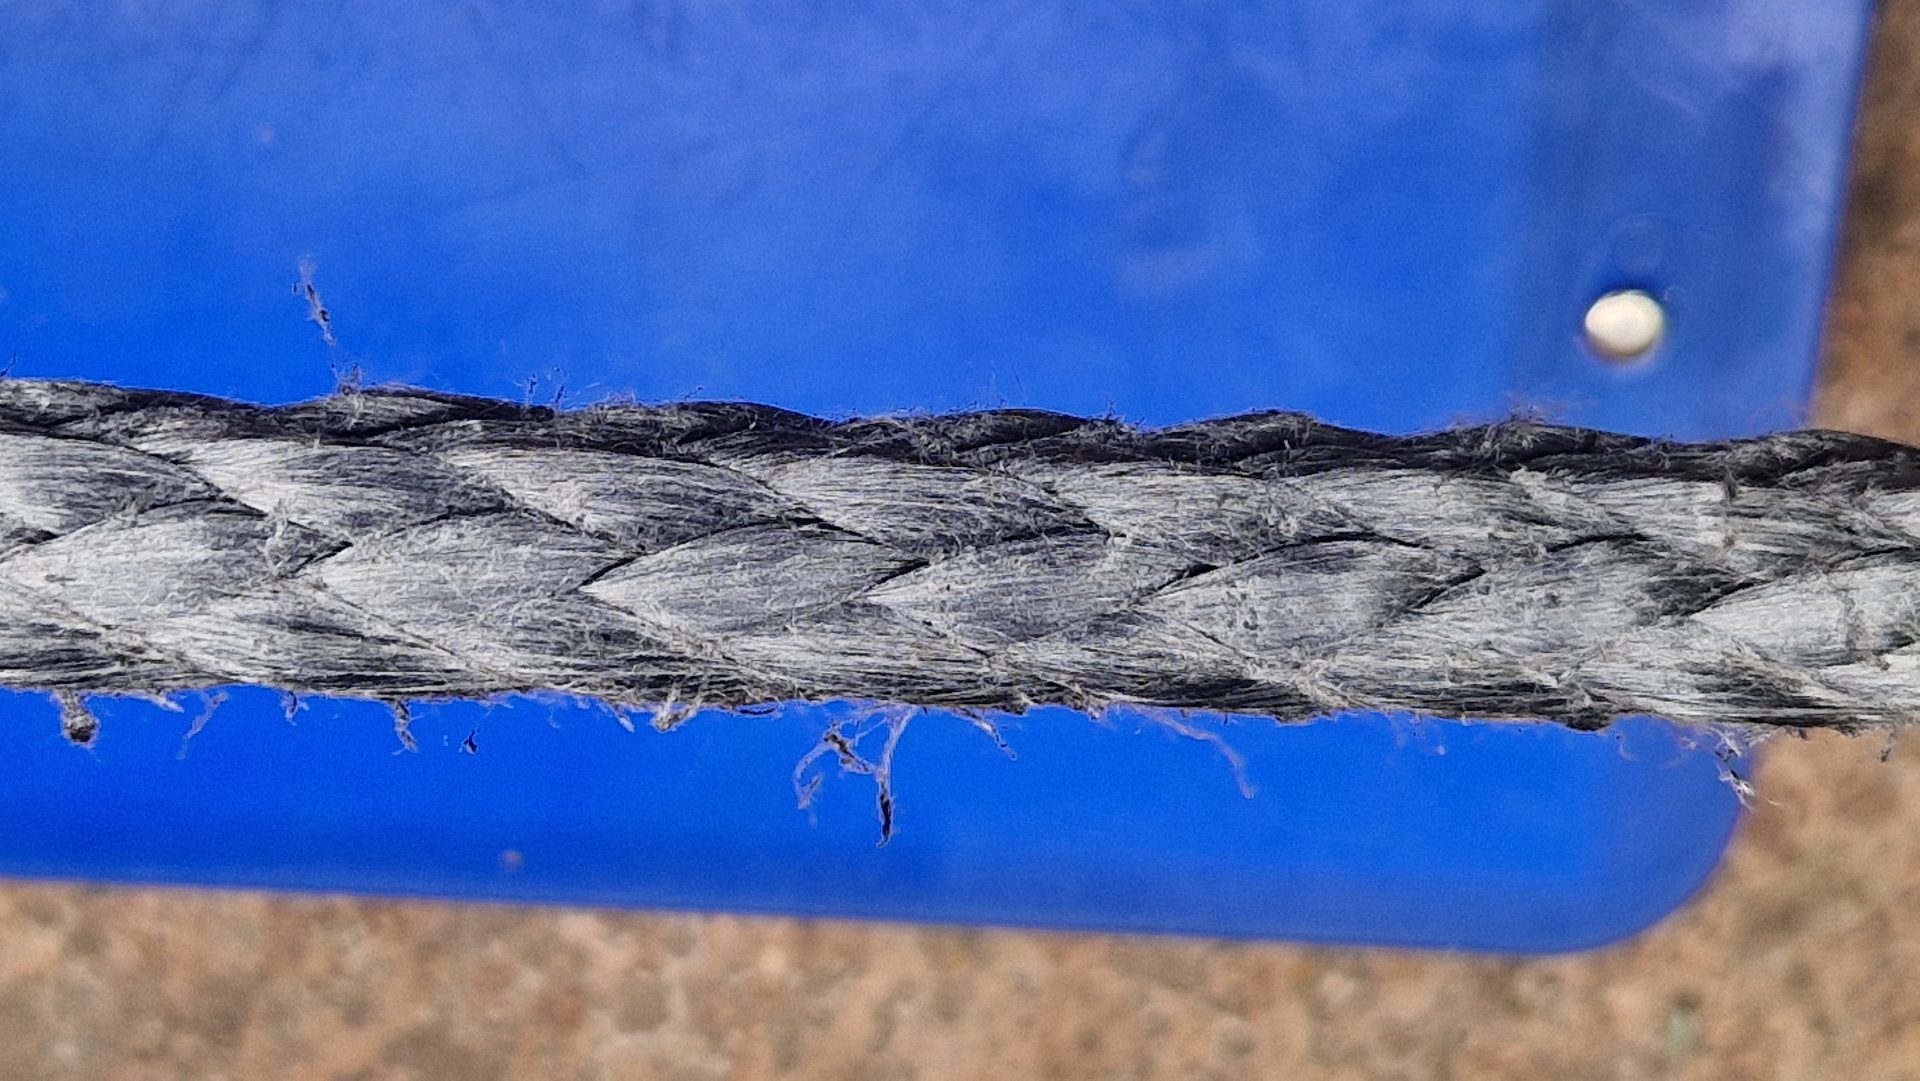
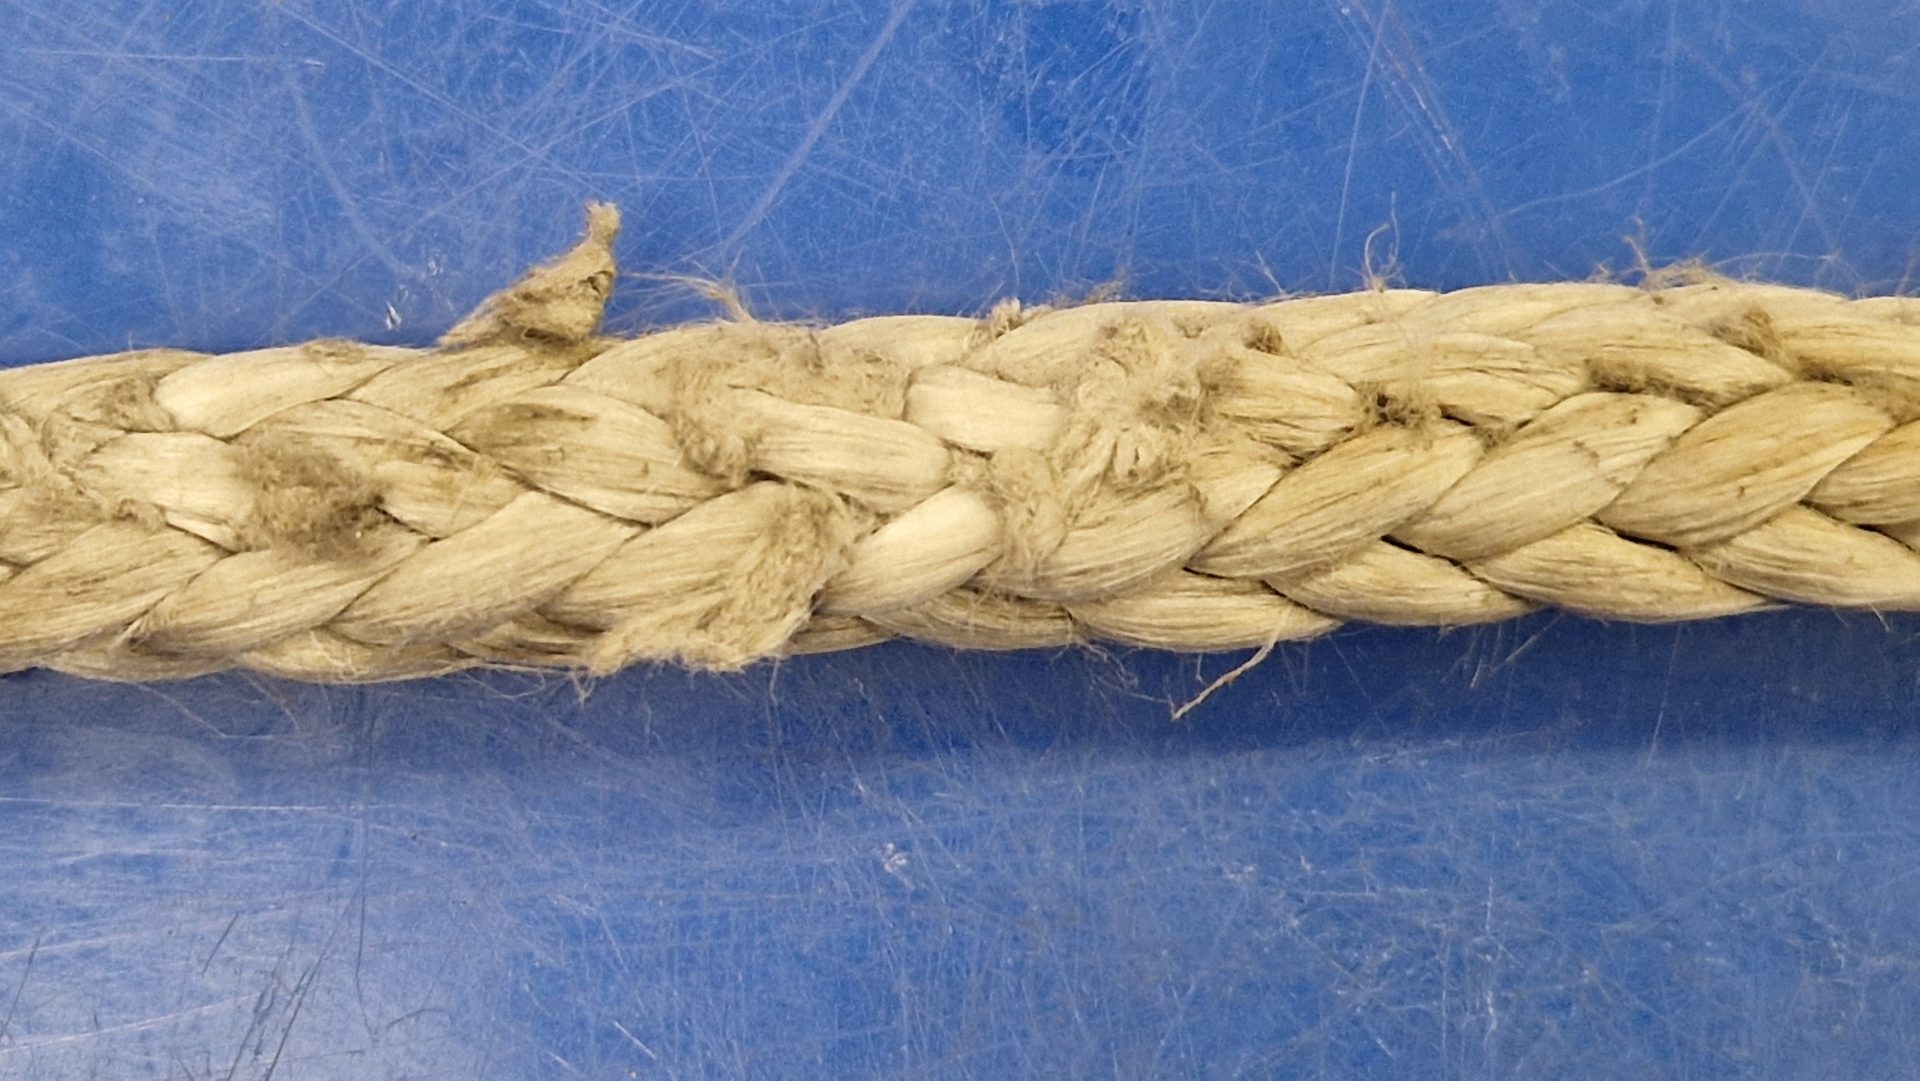
1-7 - Left to right
1) Rope prior to use.
2) Rope displaying 25% reduction from abrasion
3) Full rope strand
4) Strand reduced by 25% abrasion
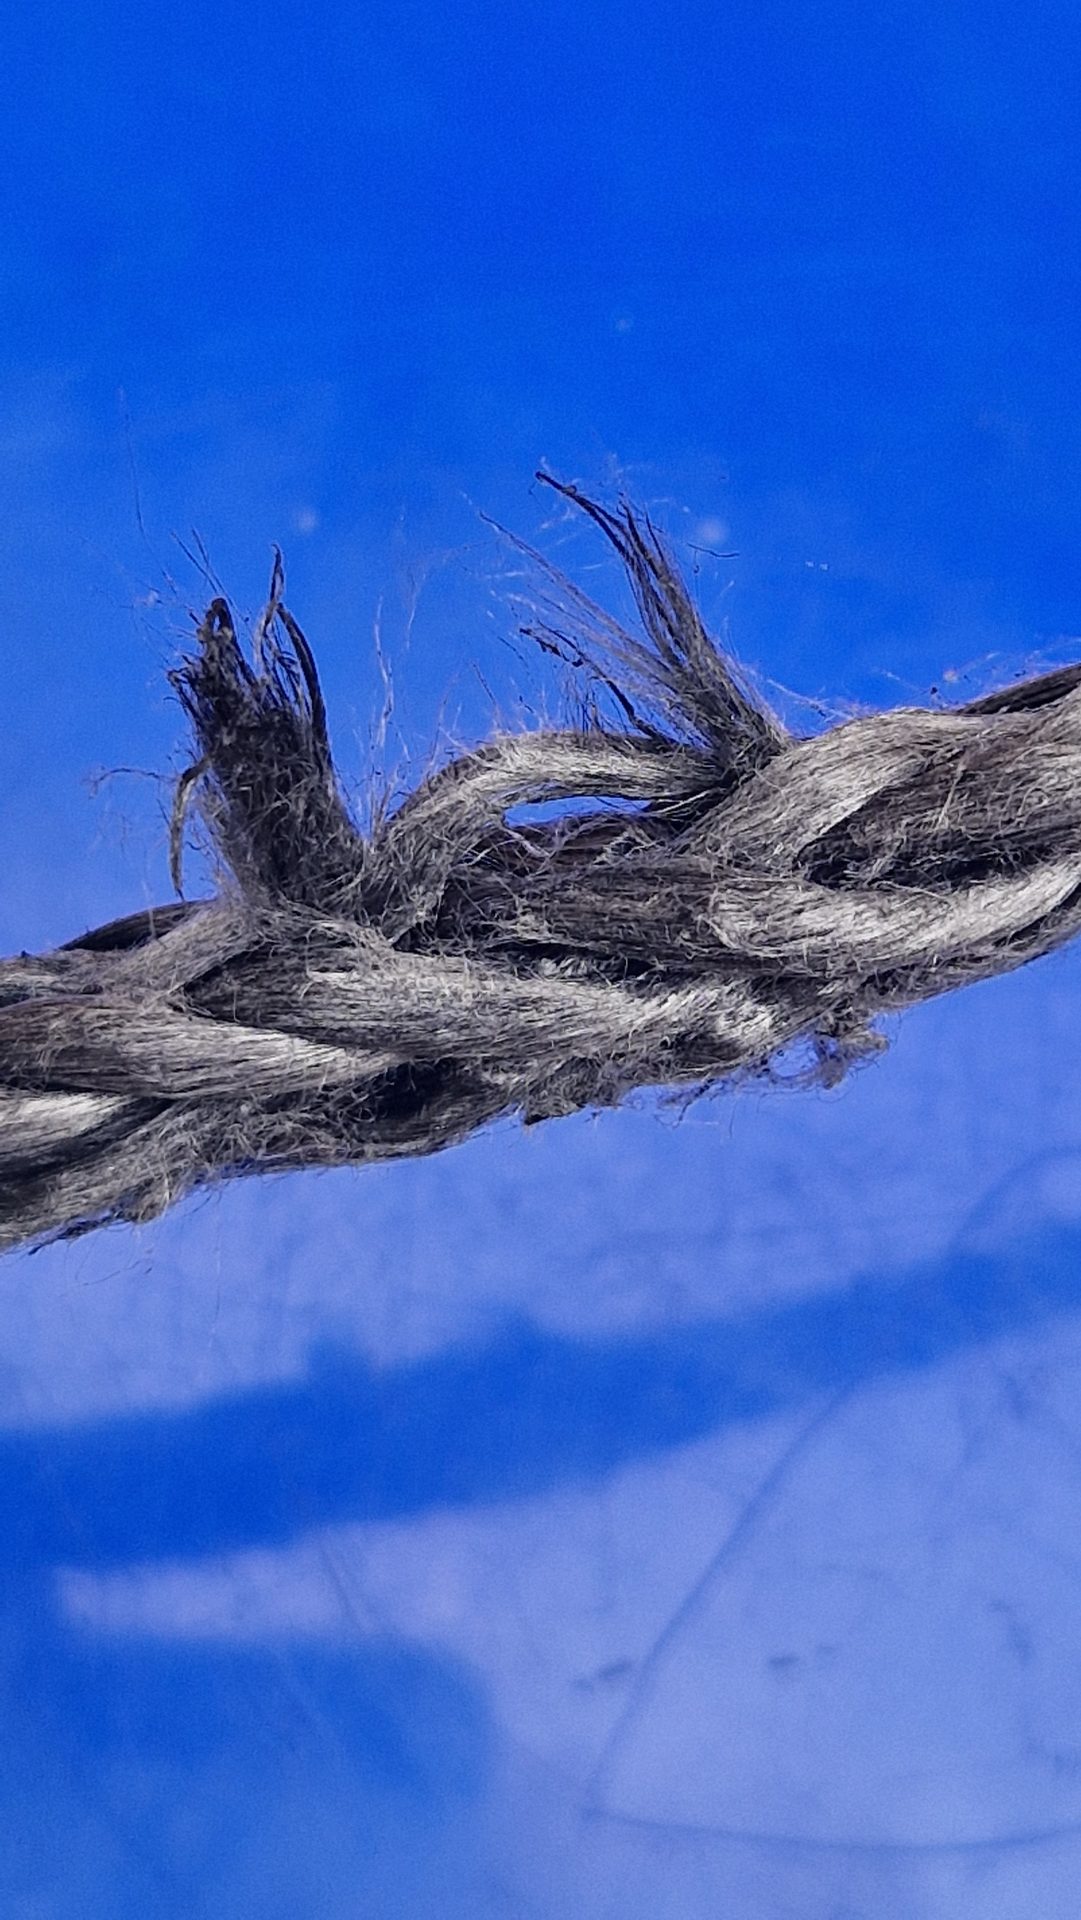
5) Rope displays two adjacent cut strands. This rope should be destroyed. In an emergency, the damaged section can be removed and the rope re-spliced. However, this should be seen as a temporary repair. The rope should then be destroyed as soon as possible.
6) This rope is showing signs of compression. If the rope is manipulated, it should return to its original state. This should not be confused with a rope affected by heat
Rope Inspection & Replacement
1 Rope Inspection
-
Visual checks for damage or abrasion.
2 Replacement Guide
Follow:
-
Rope Replacement video
-
Rope Fitting Guide V1.1
Fault Finding
Remote not turning on?
Replace batteries
Flashing red LED?
Follow binding procedure.
No power at control box?
Check using a voltmeter behind RH headlight.
Motor not turning despite power?
Replace the motor.
No power to motor?
-
Check wiring, wireless receiver (WR-01), and solenoid (DC88).
When Drum Won’t Turn
If the winch drum is stuck in free spool mode due to lack of use:
-
Set lever to free spool (horizontal).
-
Attach rope to anchor point.
-
Reverse vehicle slowly to tension rope.
-
Continue reversing to break the drum free (you may hear a “clunk”).
-
Pull forwards to release tension.
-
Test free spool operation by hand.
Important: Avoid excessive force. Do not snatch the rope using vehicle weight.
Need More Help?
For more detailed information or access to supporting videos and documentation, please contact our technical support team